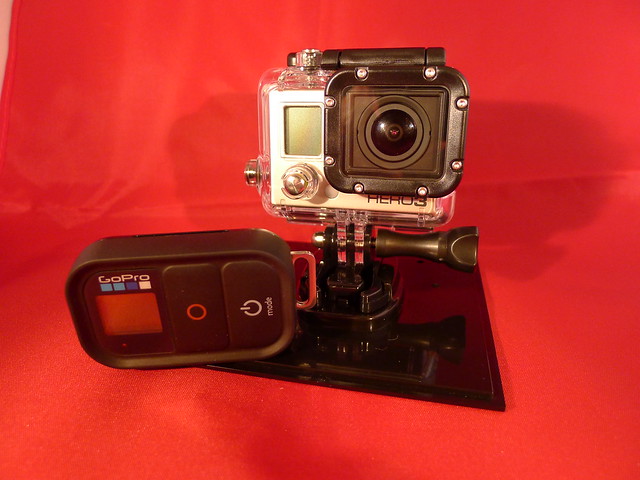
I’ve been having fun playing with the little GoPro camera. It has some quirks, but it’s great for what it’s designed to do. Of course, one of the things I’ve been using it for mostly is time-lapse. I’ve learned lots of things about this little camera, and about time-lapse in general. I can add these to my growing list of lessons learned about time-lapse.
Lesson 1 – Christmas Dinner Videos
As with leaf blowing/raking videos, it seems that everyone does Christmas dinner time lapse videos, too. There were tons of suggestions and recommendations on the page with my Christmas video, and they all had similar titles. Here’s a playlist with 10 samples…
So, the lesson here is that whatever I may come up with for a video project, someone has already done it and uploaded it to YouTube.
Lesson 2 – Panning
A little bit of movement adds a tremendous amount of visual interest to a static shot. Ken Burns discovered this and made such extensive use of it in his Civil War series that the effect now bears his name. Some of the best time-lapse videos incorporate a bit of panning into most of single-view shots.
The Arctic Light from TSO Photography on Vimeo.
Usually this is done with expensive dolly systems designed to move the camera very slowly along a designate path during the time lapse such as this one from Dynamic Perception…
Dynamic Perception Timelapse Dolly Stage Zero from MILapse on Vimeo.
When I found the little Camalapse timer, that allowed me to do some simple panning with either the GoPro or the iPhone.
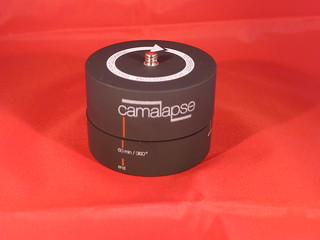
While it works very well, there are a couple of drawbacks to the Camalapse. First, the speed cannot be adjusted. Secondly, it only moves counter-clockwise, so you get a right-to-left pan. Here is a video I did with the GoPro from our back deck.
The panning seems to be a bit too quick. I think this would work best where there is a lot of activity, such as a crowded street. It worked well for the dinner scene in my Christmas Dinner video, but kept rotating the table out of the frame. I was only able to use a short segment (which was probably a good thing.)
Short of investing in expensive dolly equipment, I needed to come up with another method. I’m revealing my ignorance here, but it turns out that you can apply the “Ken Burns Effect” in iMovie to video clips as well as video stills. That was the solution to the problem.
Unlike the iPhone and iMotion app, the GoPro does not output video from the time-lapse. It takes a ton of photos at either 12, 7, or 5 megapixel size, which you then later combine into time-lapse in a video editing program.
As I discovered with the dinner video, if you shoot at the highest resolution you eat up memory. However, I’ve found a reason why you might want to do that. If you can generate a time-lapse video clip at its original resolution, it gives you lots of room for digital panning using the Ken Burns effect.
For example, here is the GoPro CinePro editing software settings. Notice that the output is set for the 7 megapixel setting – 3000 X 2250.

The original video is as follows. It shows a static position time-lapse of clouds over our little wetlands area:
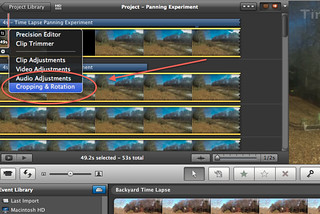
Each frame in 1080p HD video is 1920 × 1080 (2.1 megapixels). So, if you keep the video clip the same size as the source (3000 X 2250, in this case), you’ve got 1170 pixels worth of motion – that’s a lot of panning. You can open the original clip into iMovie. Once the clip is on your editing screen, click on the little gear icon and select Cropping and Rotation:
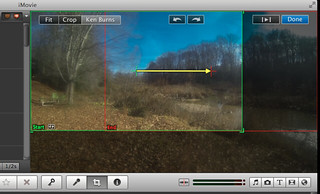
One the editing screen on the right, you can select the crop, the starting point, and the ending point of the video clip, the same as you would for a still image. The speed of the panning effect will depend on the length of the video clip.
You could do this with lower resolution video clips, but video quality would be affected. In this case, it worked quite well. Here’s the same backyard time-lapse, but this time with the digital pan effect added.
It’s subtle, but I like the effect. It just adds a bit more visual interest. As with any effect, though, it can be overdone. Now I easily can do other panning videos, both with the Camalapse and with the Ken Burns Effect.
So those are two more time-lapse lessons (Well, one really.) I’m sure I will learn more as I play with these cameras. Now all I need is lots of time to do time-lapse!


